Activation
Here are some simple steps you can take to get started with accepting card payments using Xendit. We will go deeper into technical integration methods later (or, if you are already set up with us, you can skip directly to that).
Registration
1. Register with us and create a Xendit Dashboard account.
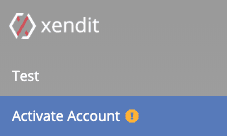
2. If you are a first-time user of Xendit, click on "Activate Account" on the left sidebar.

3. Go through the activation process - this will take around 10 minutes for you to provide us with details about your business and for us to conduct KYC (Know Your Client) checks. See our Onboarding page for more info.
4. After you have submitted your activation application, an Account Manager will get in touch to sort out some paperwork (service agreements are necessary for online payments in Indonesia).
5. Upon execution of the agreement, you can go live with us and start accepting real money through online payments!
Cards Activation
1. If you don't have an existing Merchant ID*, there are no further steps needed to activate your account. You can refer to here to get more information on Cards Activation. If you want to test transactions using API, check out this section on how to set up Postman for testing with Xendit.
*MID for short, an identification number provided by an acquiring bank to their merchant to accept card payments
2. If you have your own MID with an acquiring bank, let us know whether you want to use that MID for online card payments. In this case, you will be charged the percentage fee* by your acquiring bank directly, and Xendit will only charge a fixed processing fee for every transaction.
*Merchant Discount Rate (MDR)
What's next?
- If you're accepting card payments using our XenInvoice product, that's it!
- Looking to do a direct integration with your webpage? Read our integration and testing guide.
- You can also learn more about the flow involved in a typical card payment. Start with Tokenization here.
Last Updated on 2024-04-25